-
 GETTING STARTED WITHQNAP ES SERIESA step-by-step guide that helps you set up your NAS
Hardware Installation
Before beginning the installation process, here are a few things you will need:
- Plan and choose the right drives
- A Phillips head screwdriver
- 2 network switches (for network failover)
Install Drives
THINGS TO KNOW
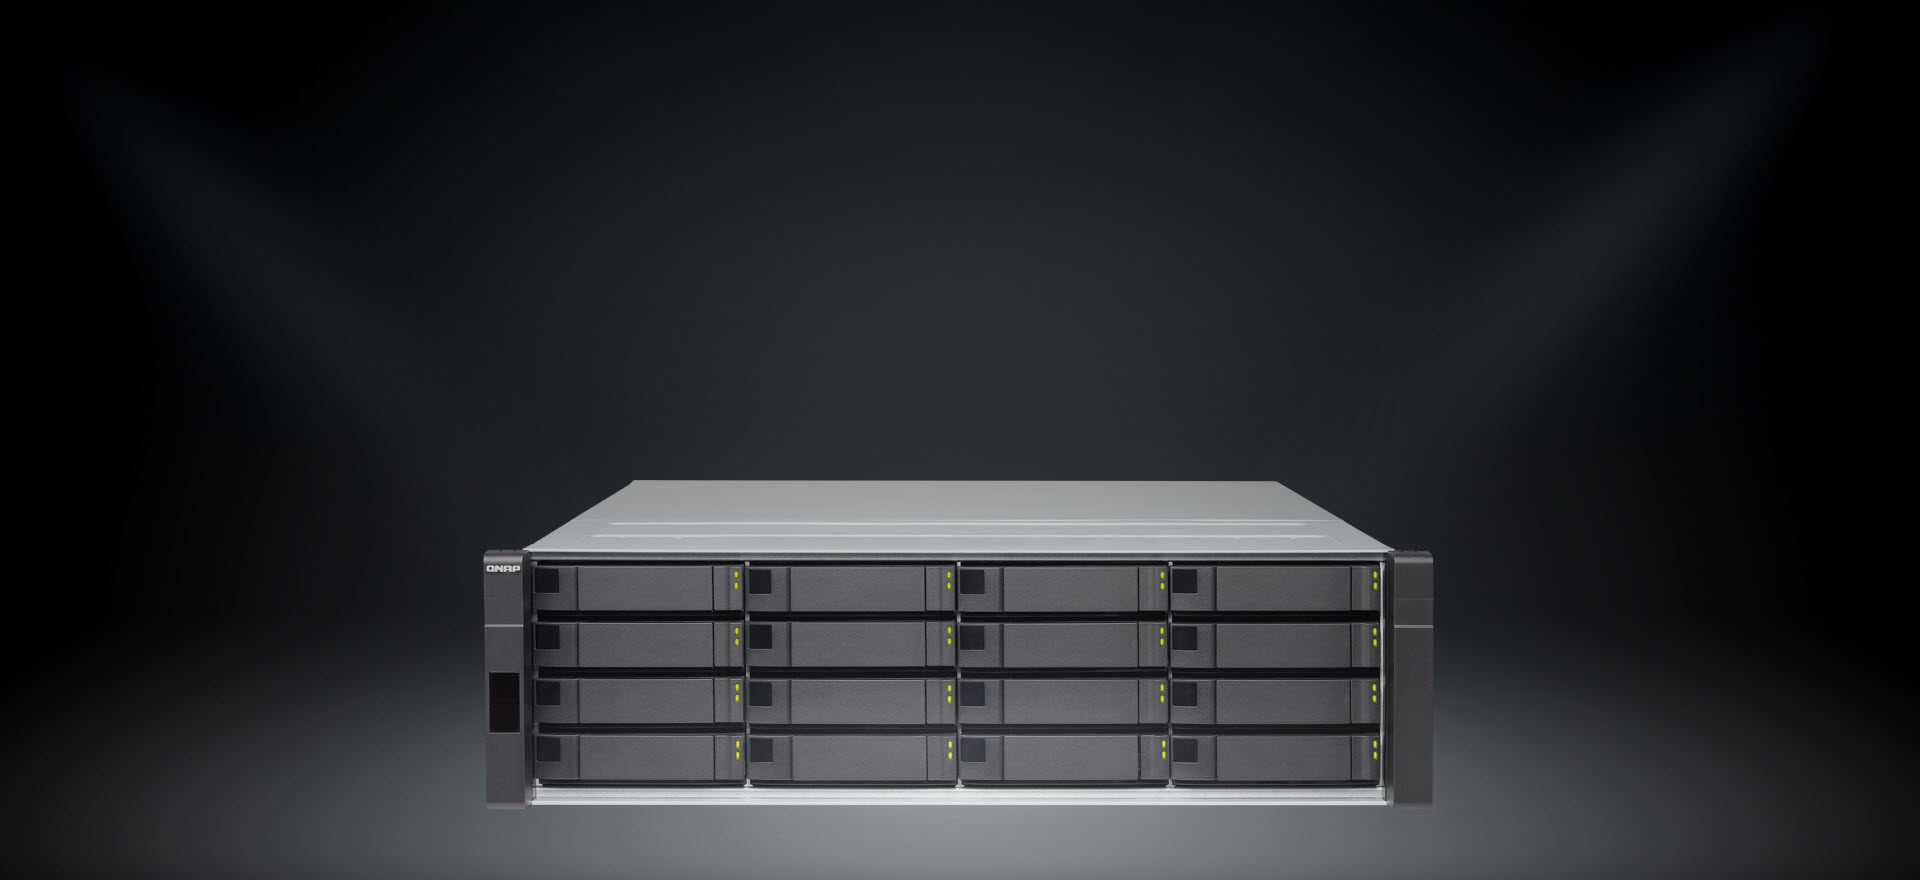
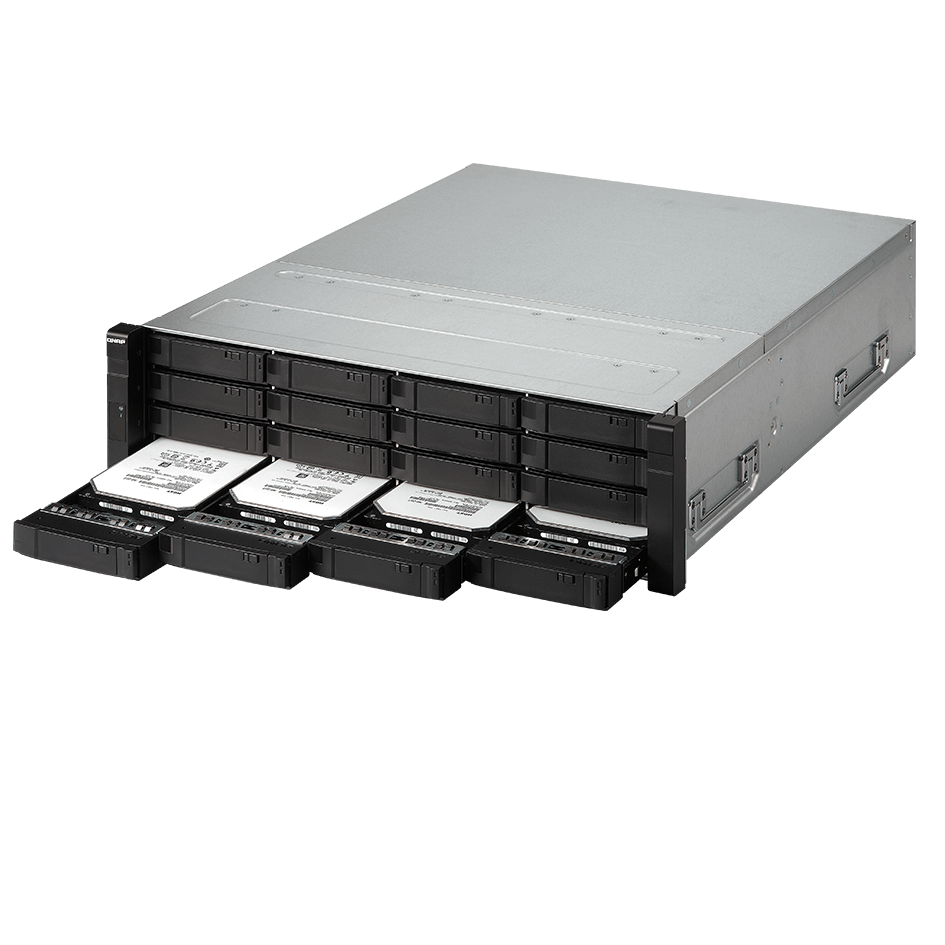
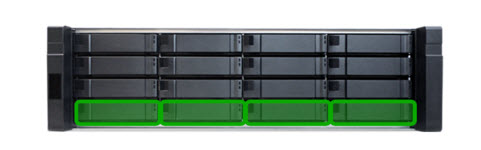
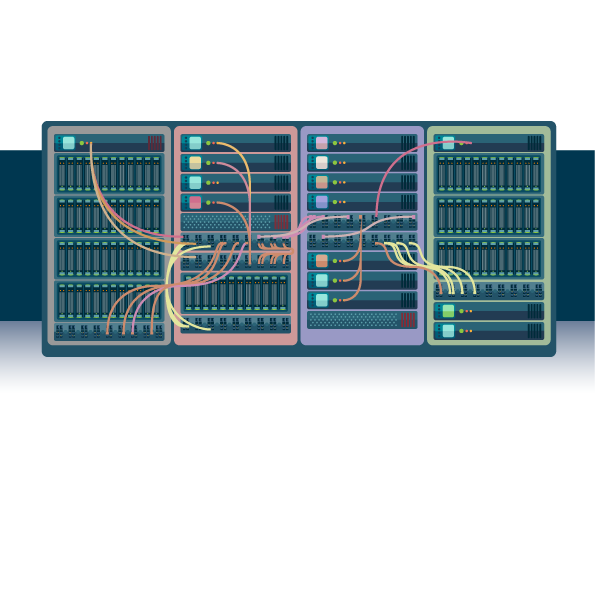
The QNAP ES series NAS is an enterprise-grade storage solution that comes with dual active-active controllers (single box high availability). In order to provide the actual failover on multiple controllers, dual-ported SAS drives* are required for the ES series NAS. Note that at least 2 SAS drives have to be installed on disk tray #1 to #4 (as indicated below) respectively for installing the QES OS.
Complete drive compatibility list: 3.5" HDD, 2.5" HDD, and SSD.
Install Rails

THINGS TO KNOW
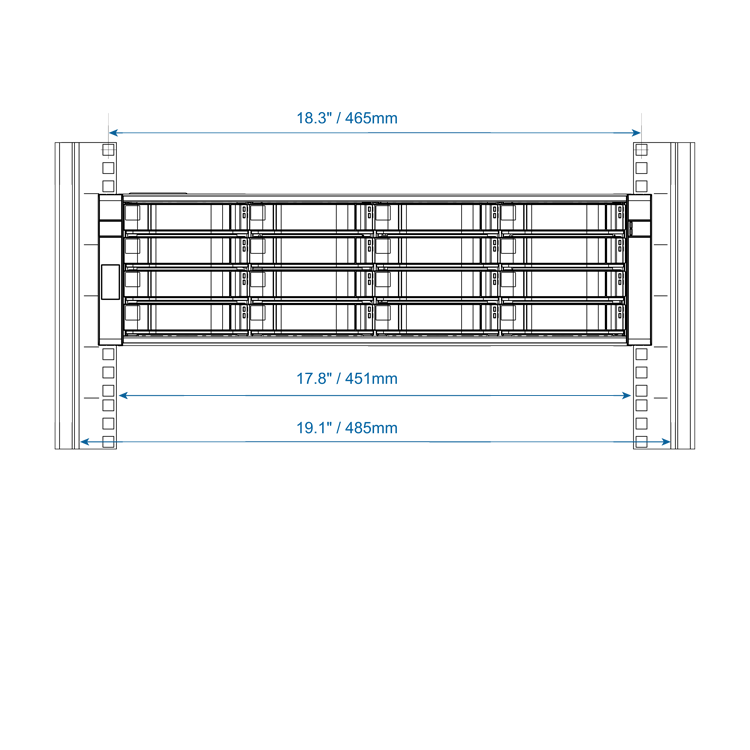
Both ES1640dc v2 (NAS) and EJ1600 v2 (Expansion unit) come with rail kits which comply with ANSI/EIA-RS-310-D rack mounting standards. Before purchasing the server racks for these models, please make sure the server racks conform to the following criteria:
- Mounting post width: ≥ 451mm
- Panel width: ≥ 485mm
- Mounting post depth: 609.6mm~914.4mm
- The distance between two rack posts is 465mm (center-to-center measurement of the rack's square holes)
Note: The rack kits for the ES series NAS devices are compatible with both square-hole and round-hole server racks.

Cabling

THINGS TO KNOW
To deploy a complete failover environment, except for its dual active-active controller architecture, each controller of the ES series NAS also provides redundancy for the following components:
- POWER SUPPLY UNIT Each controller comes equipped with one 770W PSU for fault tolerance.
- MANAGEMENT PORT* Each controller has one 1GbE port for local/remote management.
- DATA PORT* Each controller has six 10GbE ports (4 x SFP+ and 2 x RJ45) for data transmission.
- SAS EXPANSION Featuring dual controllers, dual-loop architecture, the ES1640dc v2 and the corresponding JBOD expansion enclosures all provide dual-channel (Dual Path) to tolerate single node failure. Even if an external JBOD cable is disconnected due to external damage to the mini-SAS cable, it can still run normally. This is essential for better intermachine data protection and capacity scalability.
*It is suggested that the ethernet port(s) on each controller should connect to a different network switch for a complete failover deployment.

Install Expansion Units

THINGS TO KNOW
Both the ES series NAS and its expansion/JBOD unit (EJ1600 v2) support dual-channel (Dual Path) to tolerate single node failure. In the event of a JBOD disconnection, the whole storage system can still run normally. This is essential for mission-critical enterprise environments, such as virtualization applications, video surveillance and TV broadcast storage.
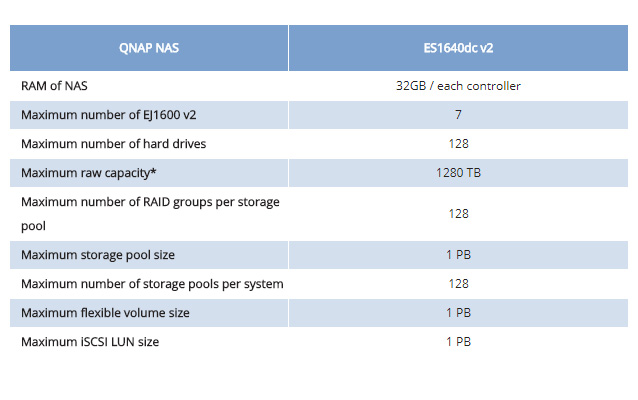
*Maximum raw capacity will base on the maximum capacity for each drive, QNAP Enterprise Storage support up to 128 drives in a set of storage system.
All set? Let's move onto the next step.
System Configuration
Setting up your NAS and installing the OS only takes a few simple steps
1. Download Qfinder Pro
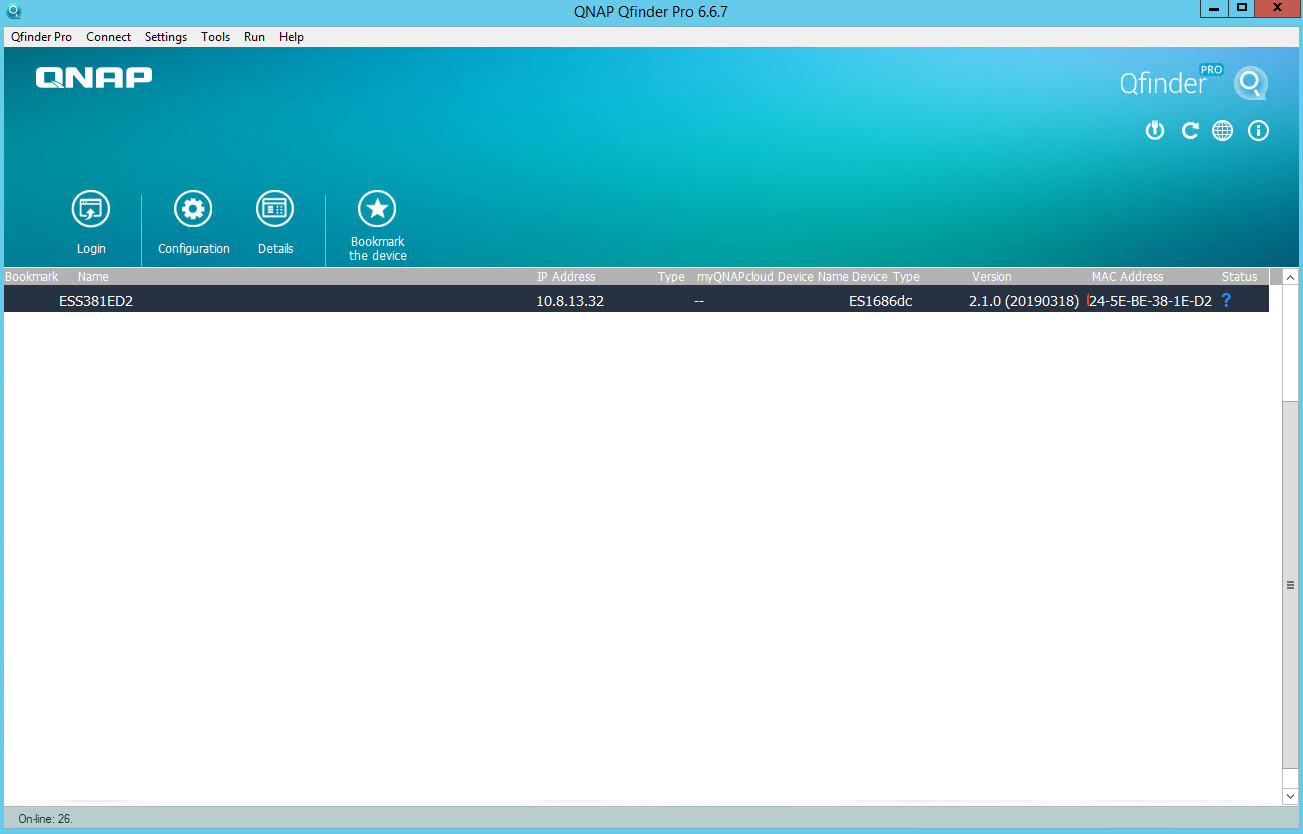
Qfinder Pro is a utility which helps you to quickly find and access to your QNAP NAS in the local network. Simply install the Qfinder Pro on your computer, open it, and double-click on your NAS, and then you will be redirected to the initialization screen. Download the latest Qfinder Pro for your Windows, Mac or Linux here
2. Initialize your NAS System
-
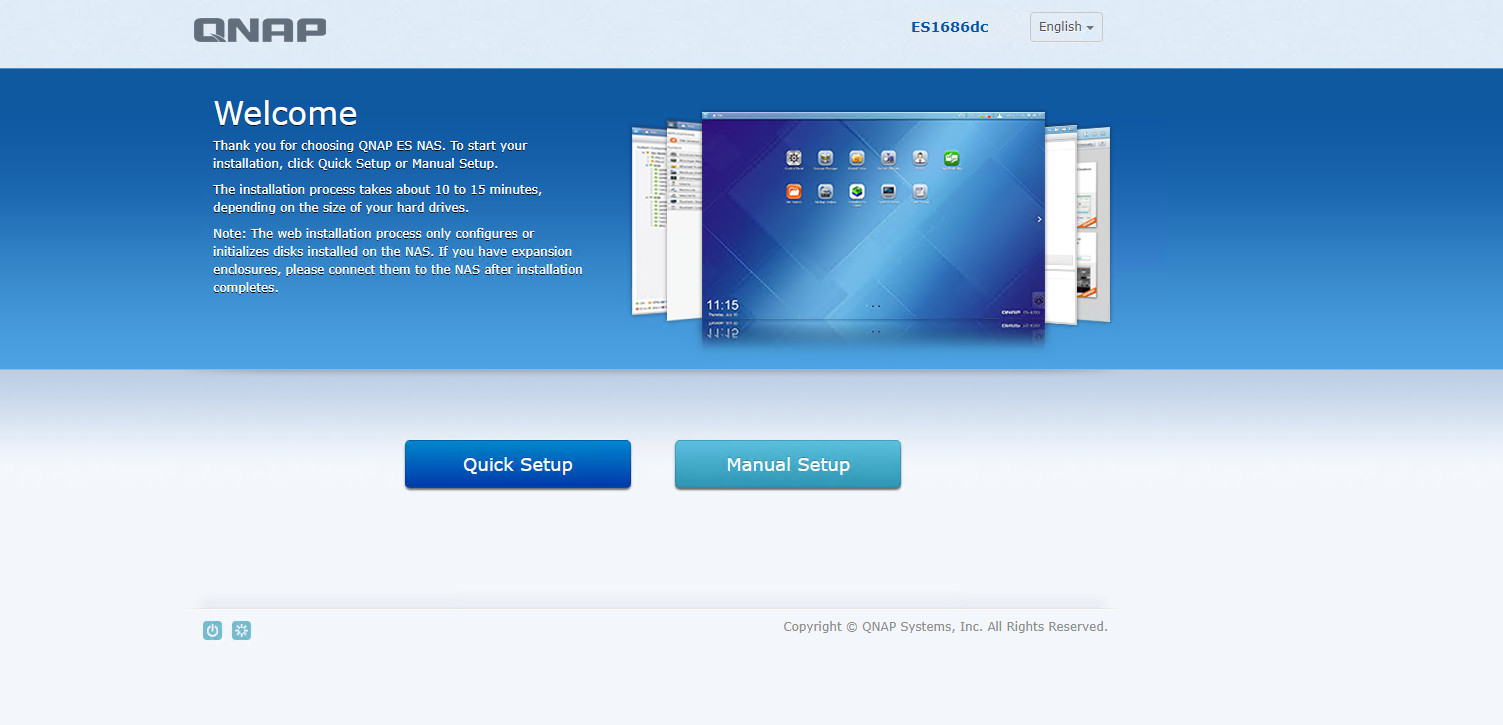
STEP 1. You can either choose to perform a quick setup or a manual setup. In this example, we will show you how to set up your NAS manually.
-
STEP 2. Configure the name of your NAS, and change the password of the default administrator account (admin).

-
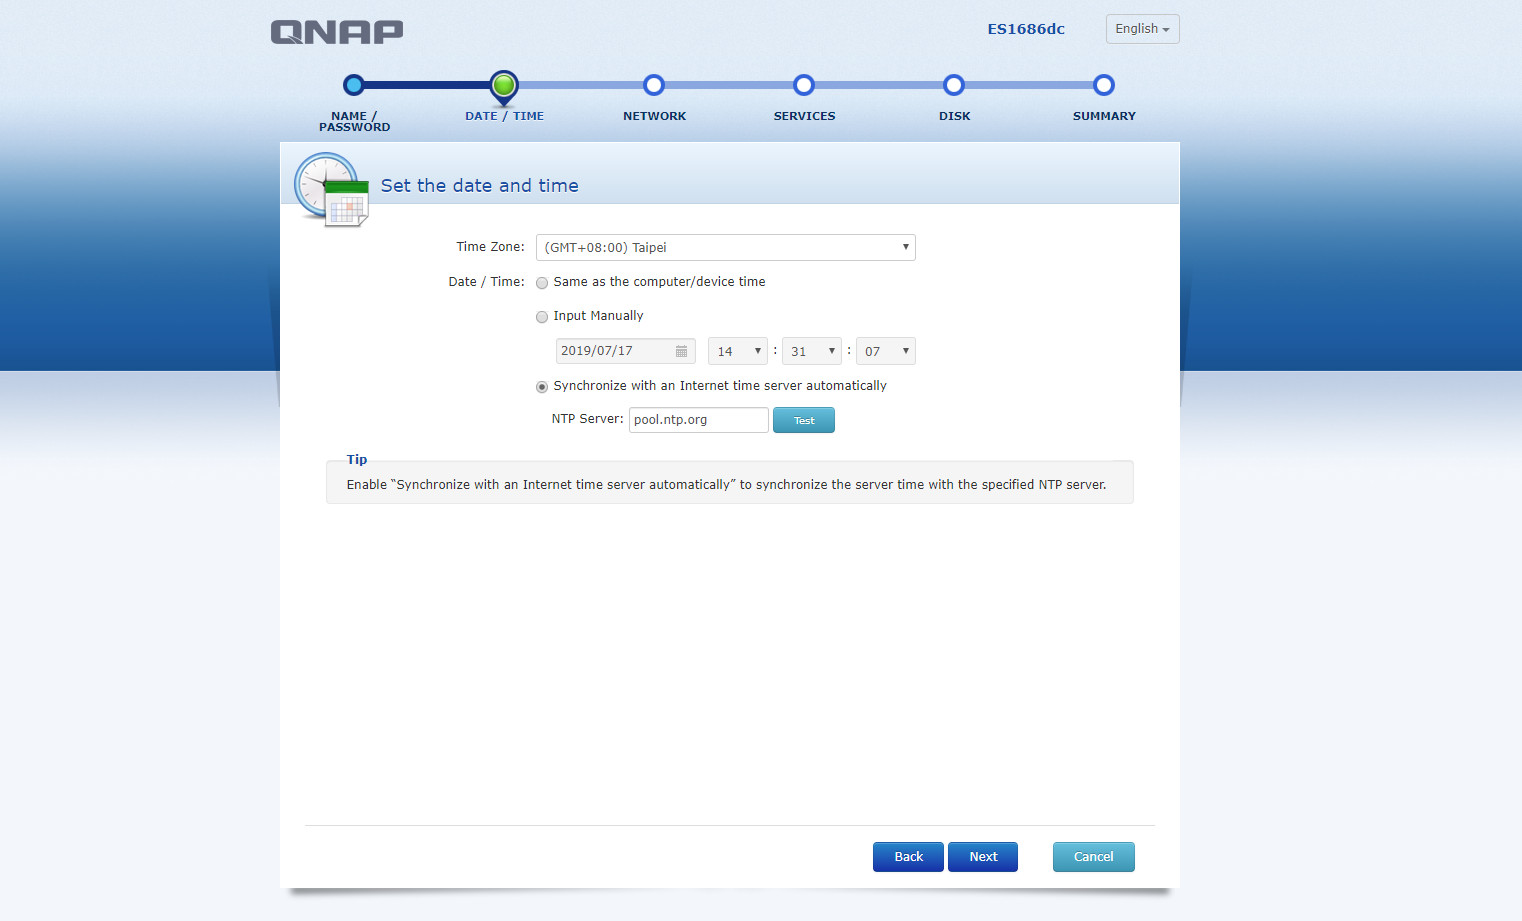
STEP 3. Set the date and time of your NAS.
-
STEP 4. Configure the network settings of each controller.
Note: The IP address of SCA/ SCB here are used for management only, please help to configure your data LAN after completing NAS initialization.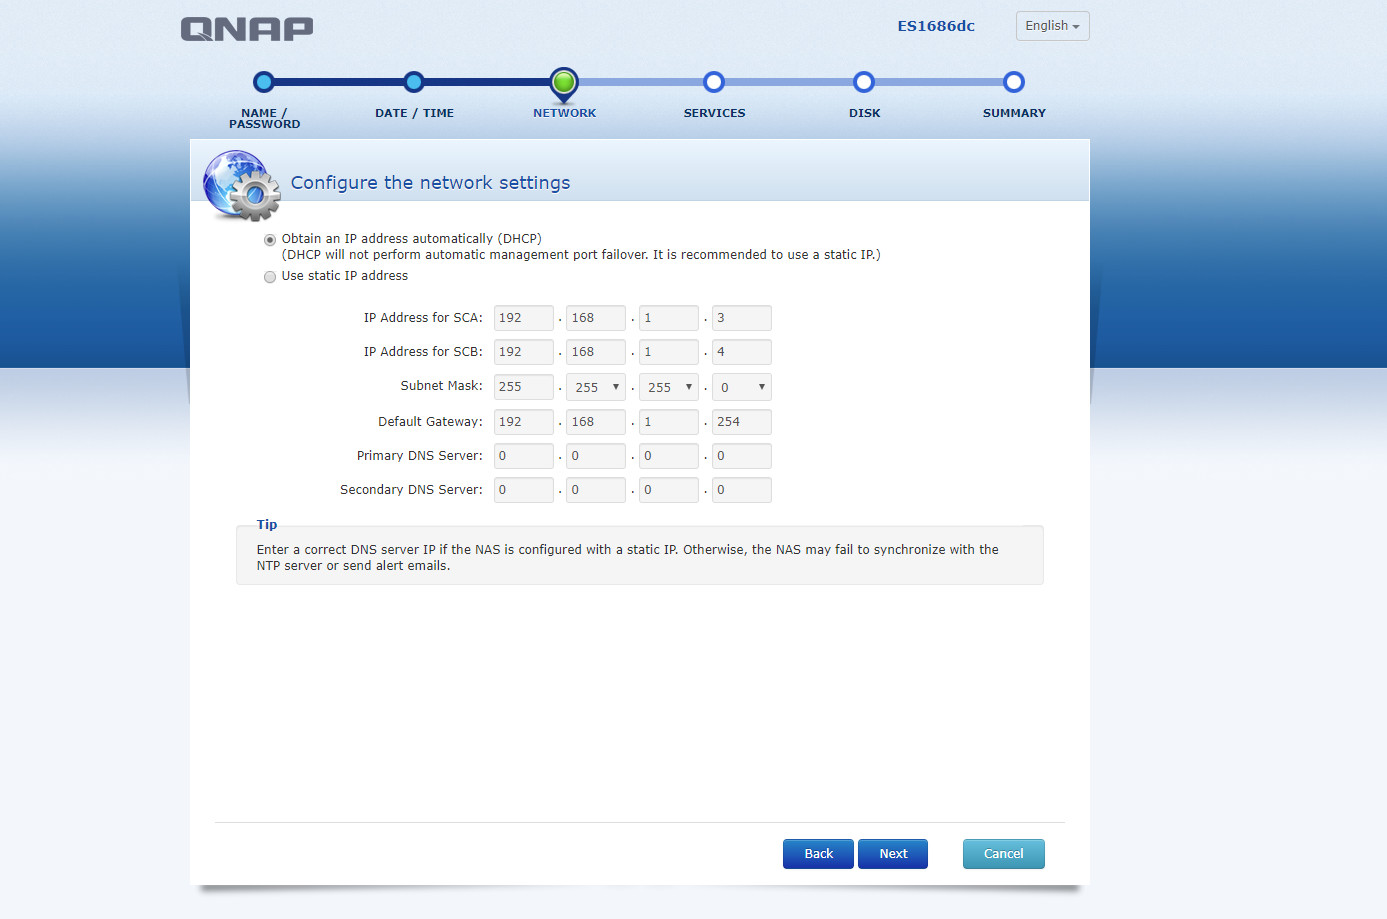
-
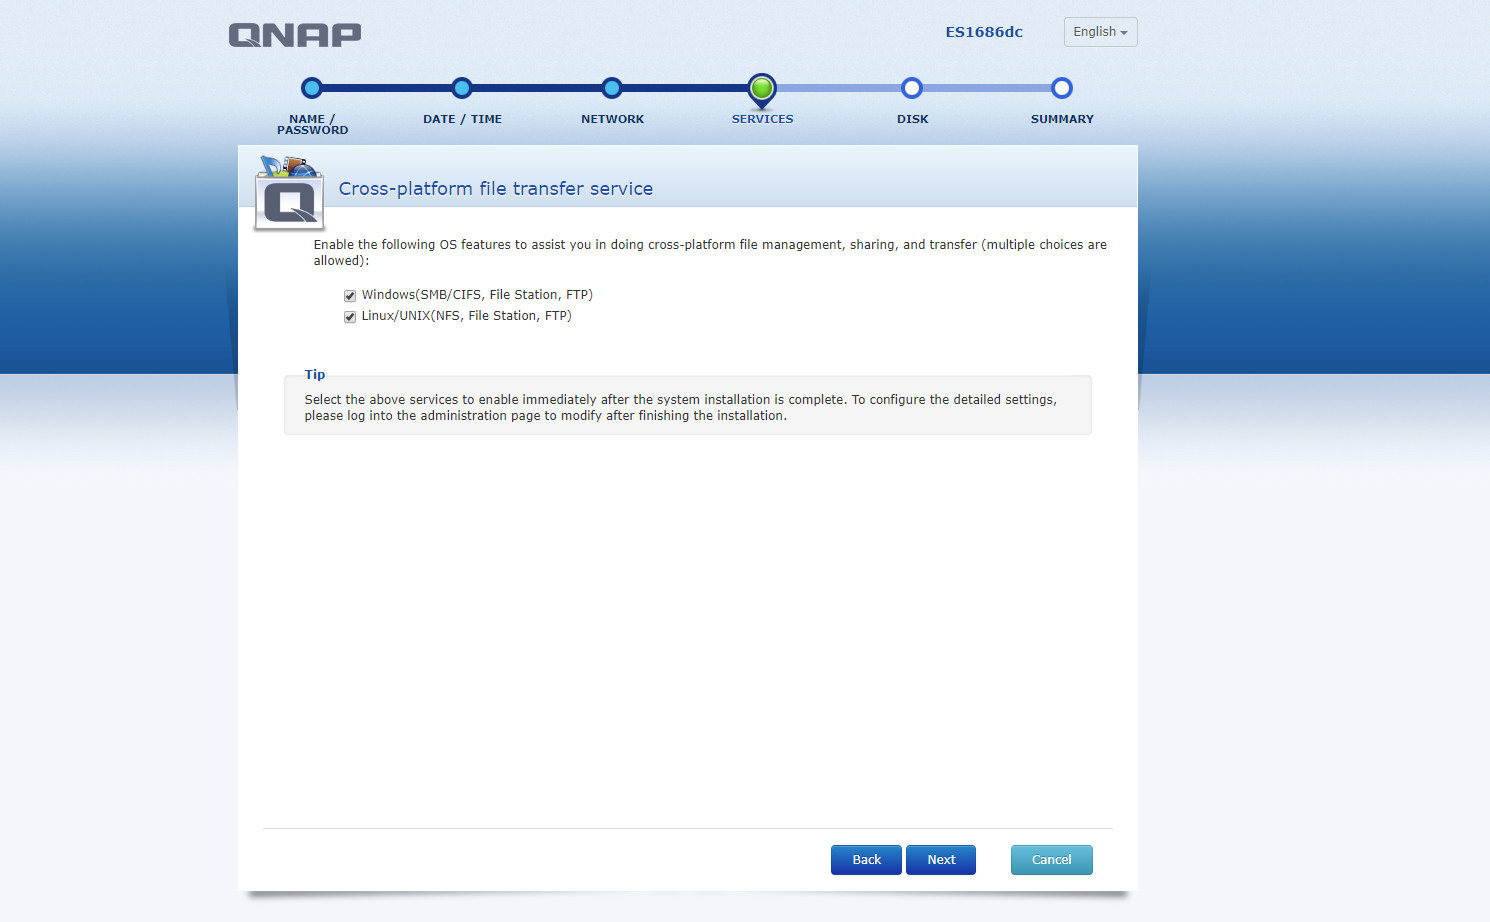
STEP 5. Enable the file transfer protocols.
-
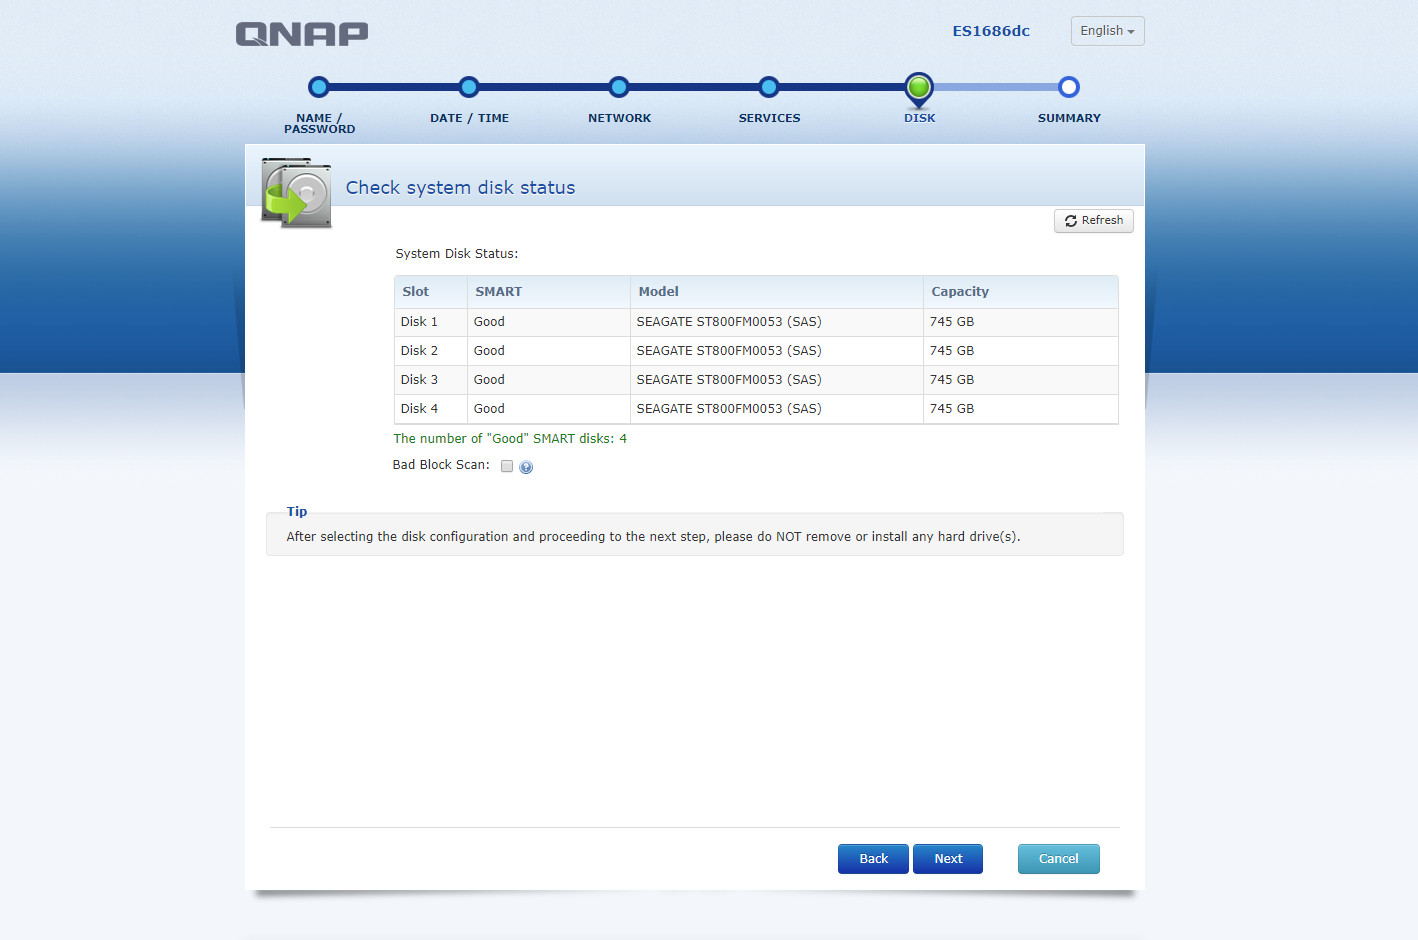
STEP 6. Check the status of the system disks. Note that you will only see the disks in slot #1 to #4 here which will be used to install the QES OS.
-
STEP 7. Confirm all the settings and click [Apply] to begin installation.
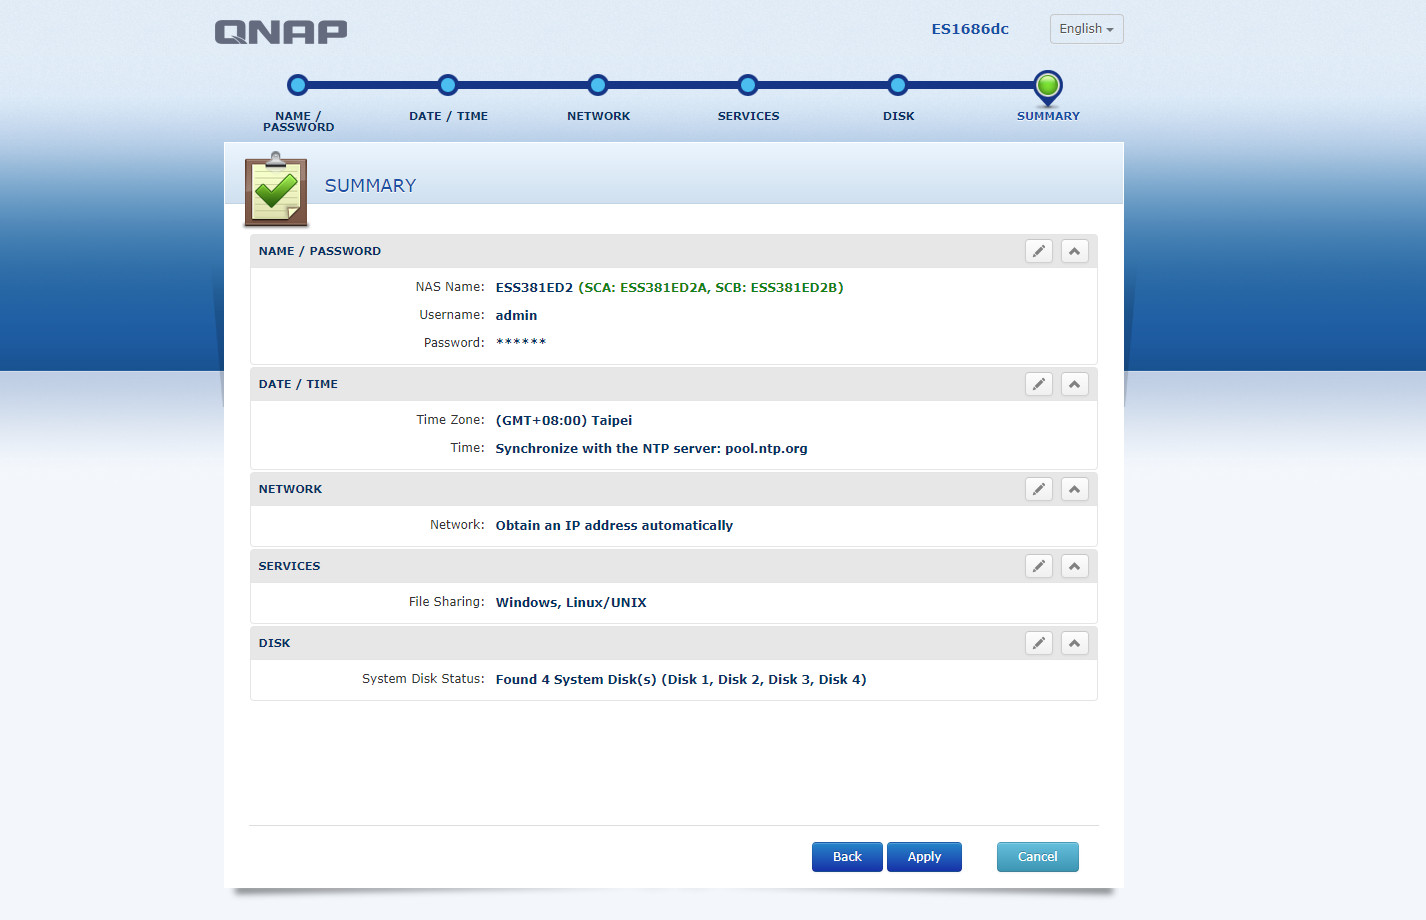
-
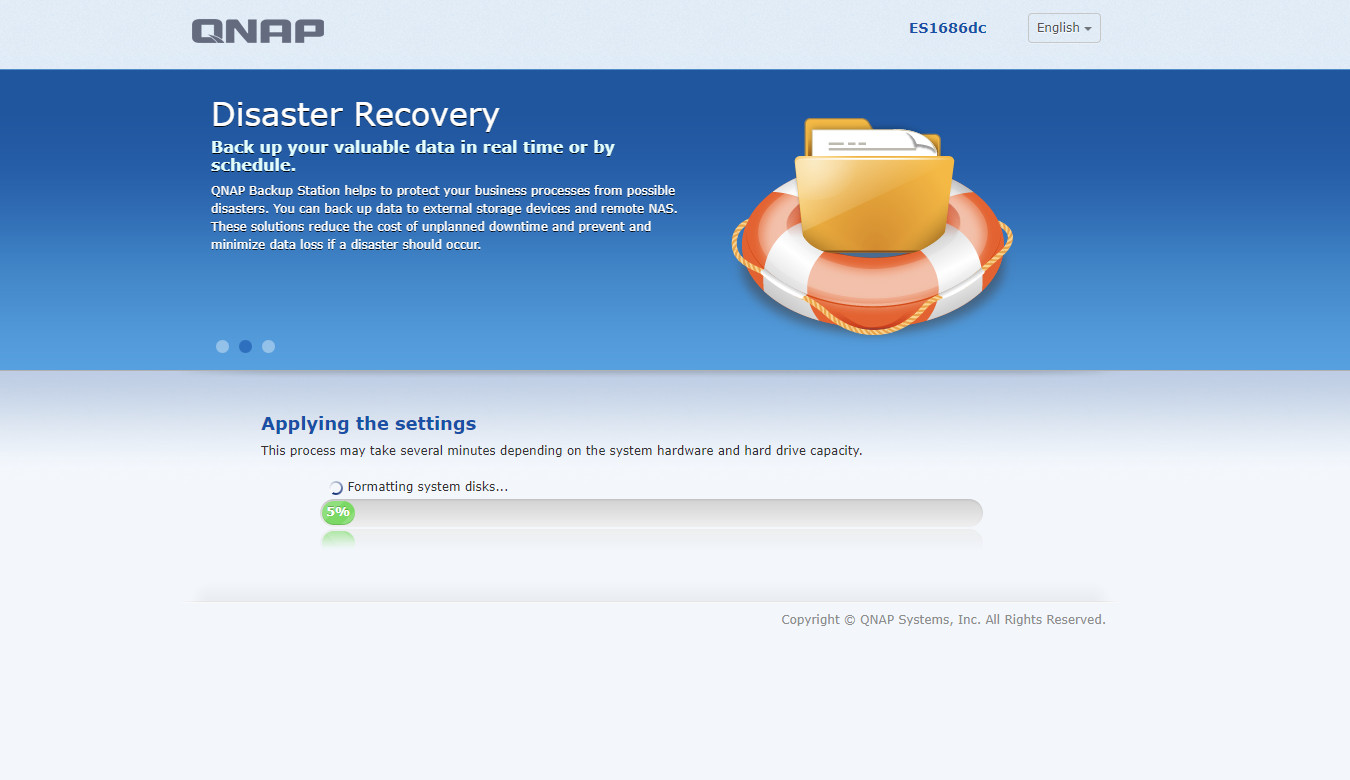
STEP 8. Your NAS is now being initialized, and this will take a few minutes.
3. Create the First Storage Pool
-
STEP 1. Once your NAS has been initialized, you may see a pop-up message such as the one below when you log into QES for the first time. It is because the system detects that you have installed additional disks in slot#5 to #16 which have not been initialized yet.

-
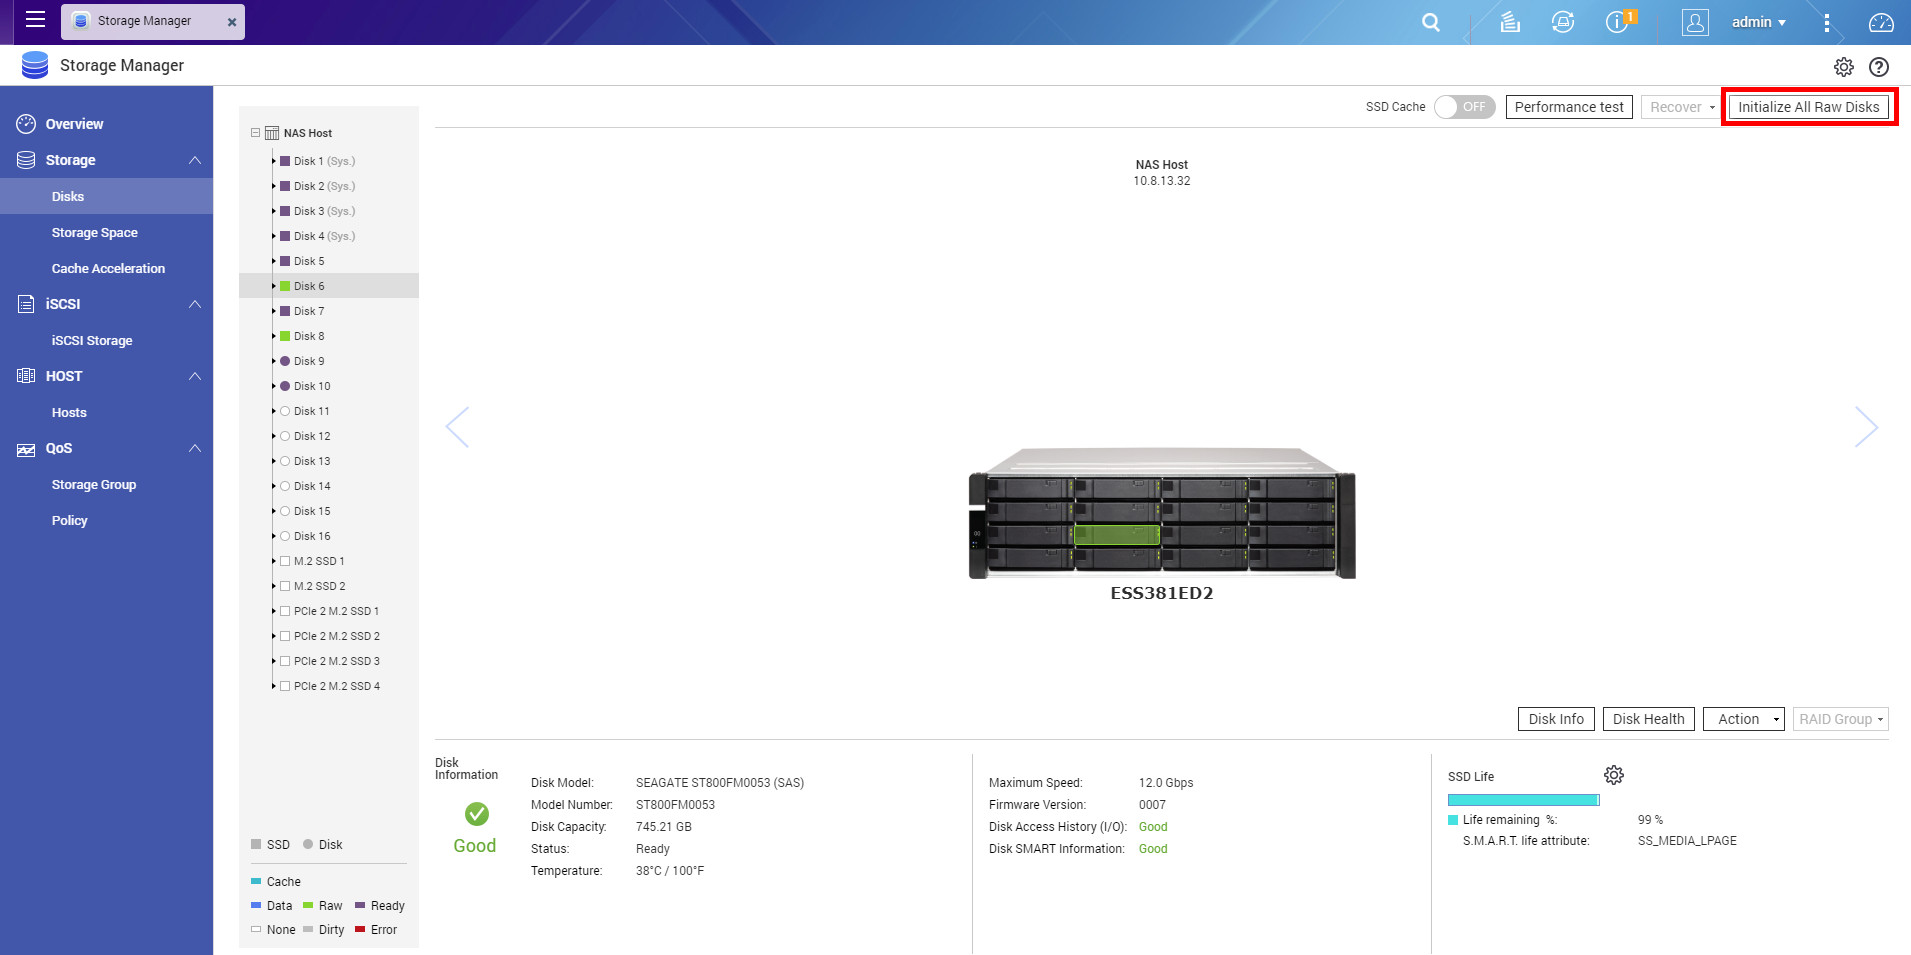
STEP 2. Go to [Storage Manager] > [Storage] > [Disks] page, you can see that there are several "RAW" drives (marked in light green). Before you can use them for creating a storage, you need to click [Initialize All Raw Disks].
-
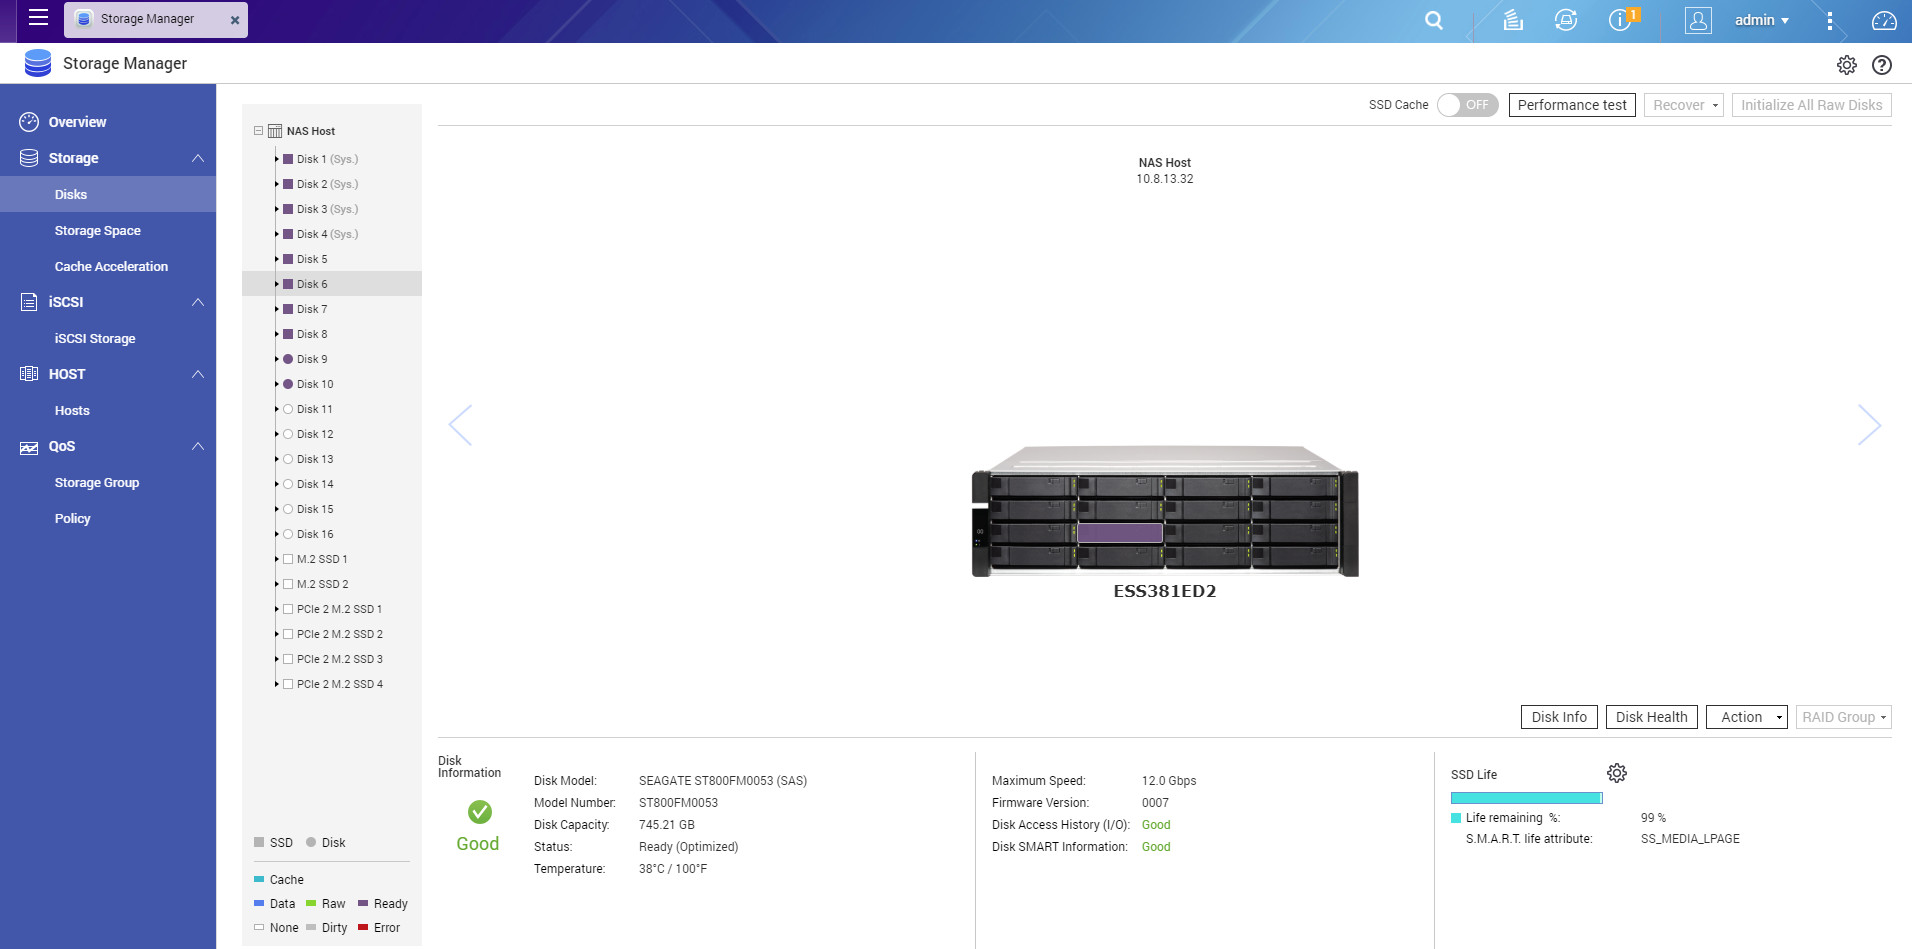
STEP 3. Once all the drives show ready (marked in purple), then you can start using them.
-
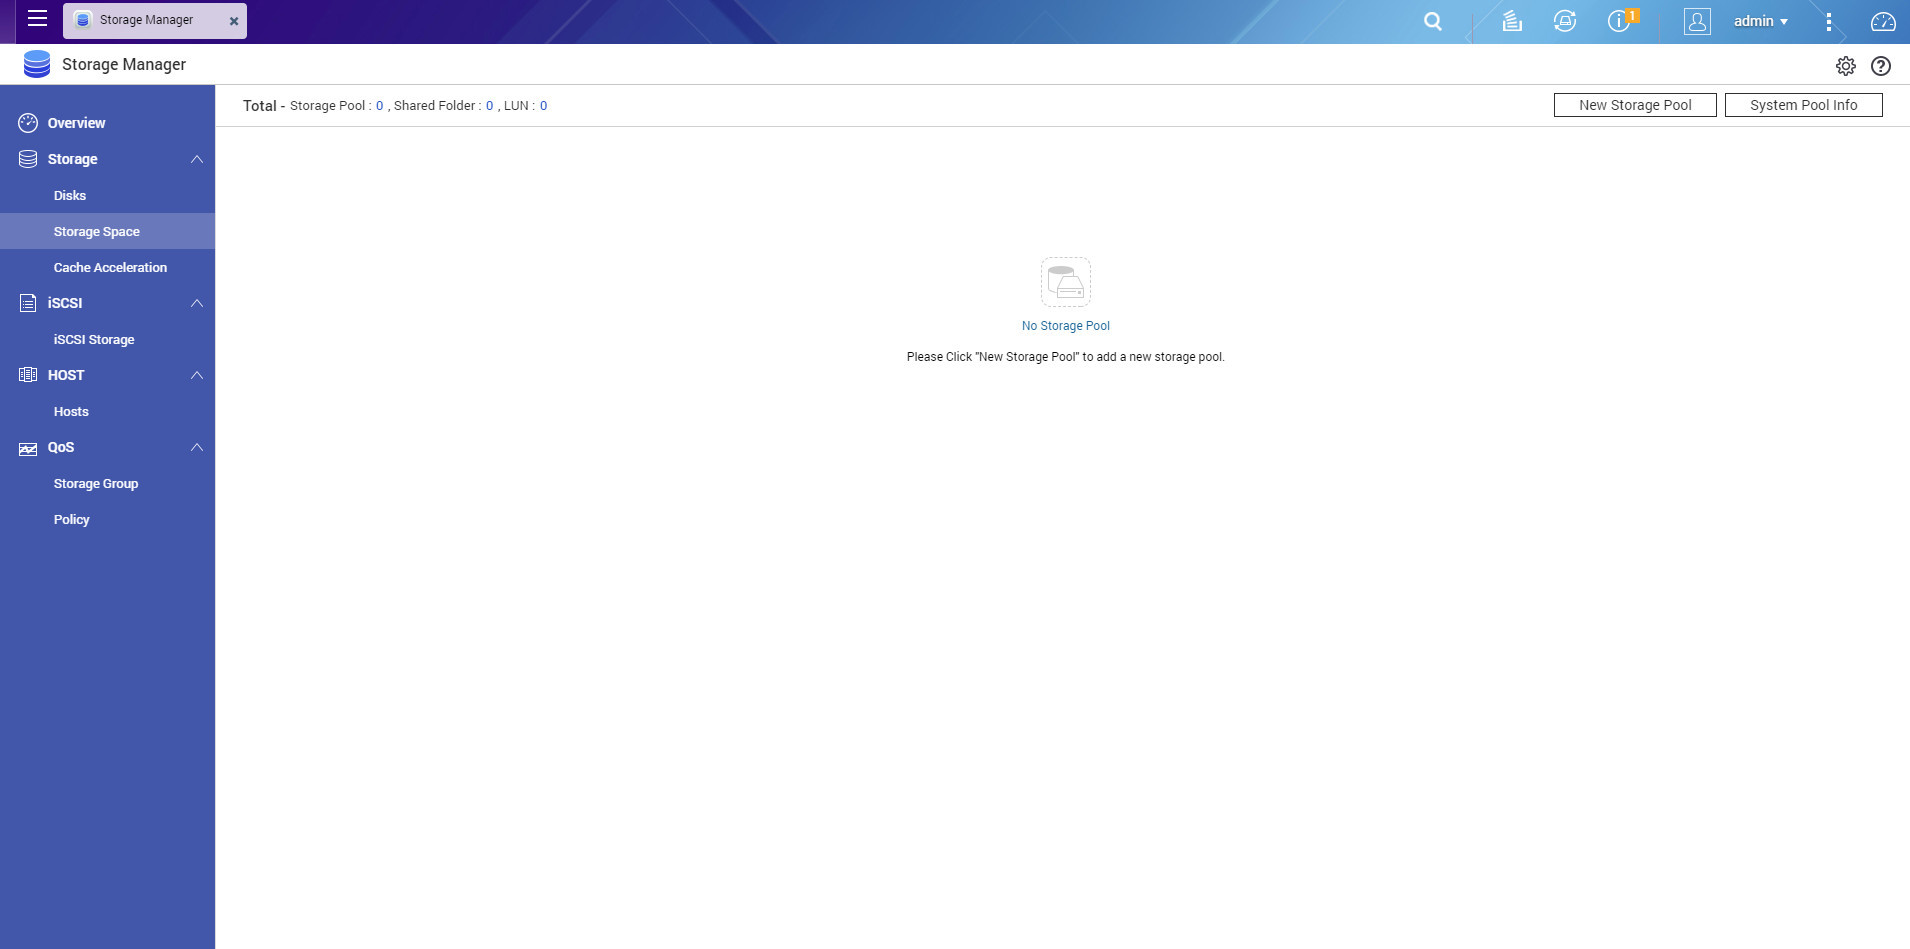
STEP 4. To create your 1st storage pool, let's go to [Storage Space] on the left-hand side. Click [New Storage Pool] from the dropdown menu at the top right hand corner.
-
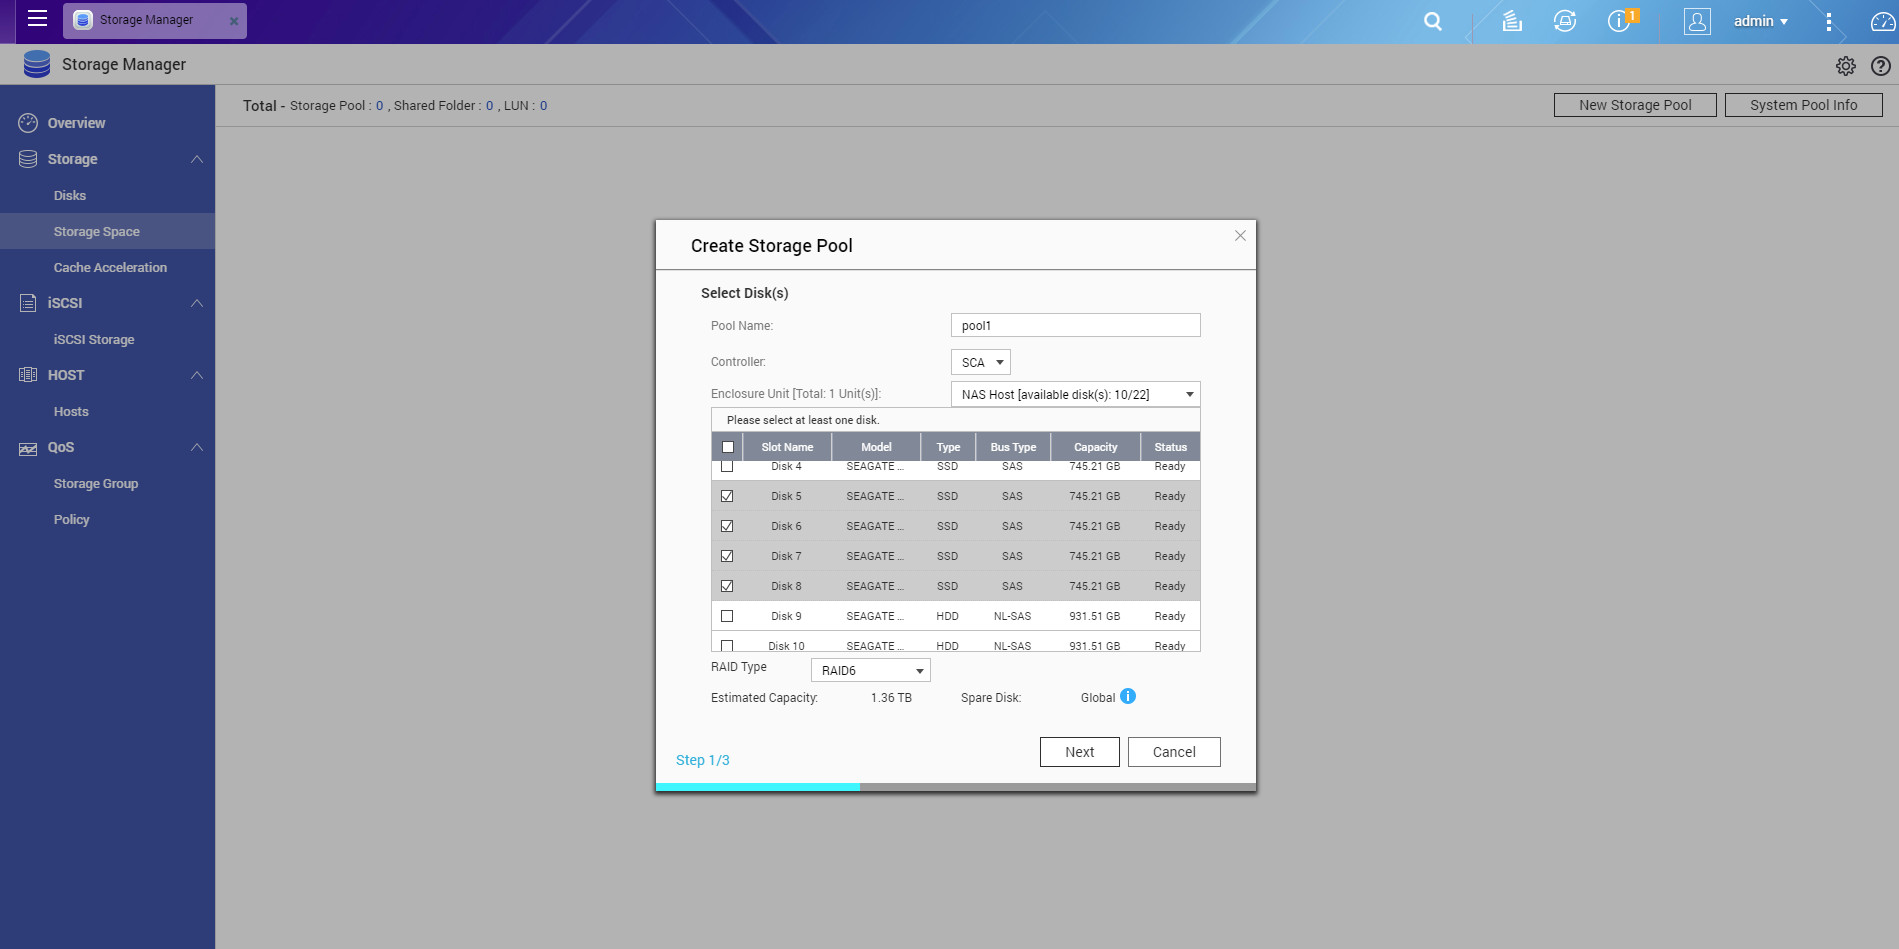
STEP 5. Choose the drives you wish to use in this storage pool, assign the storage pool to a controller, and select the RAID type.
-
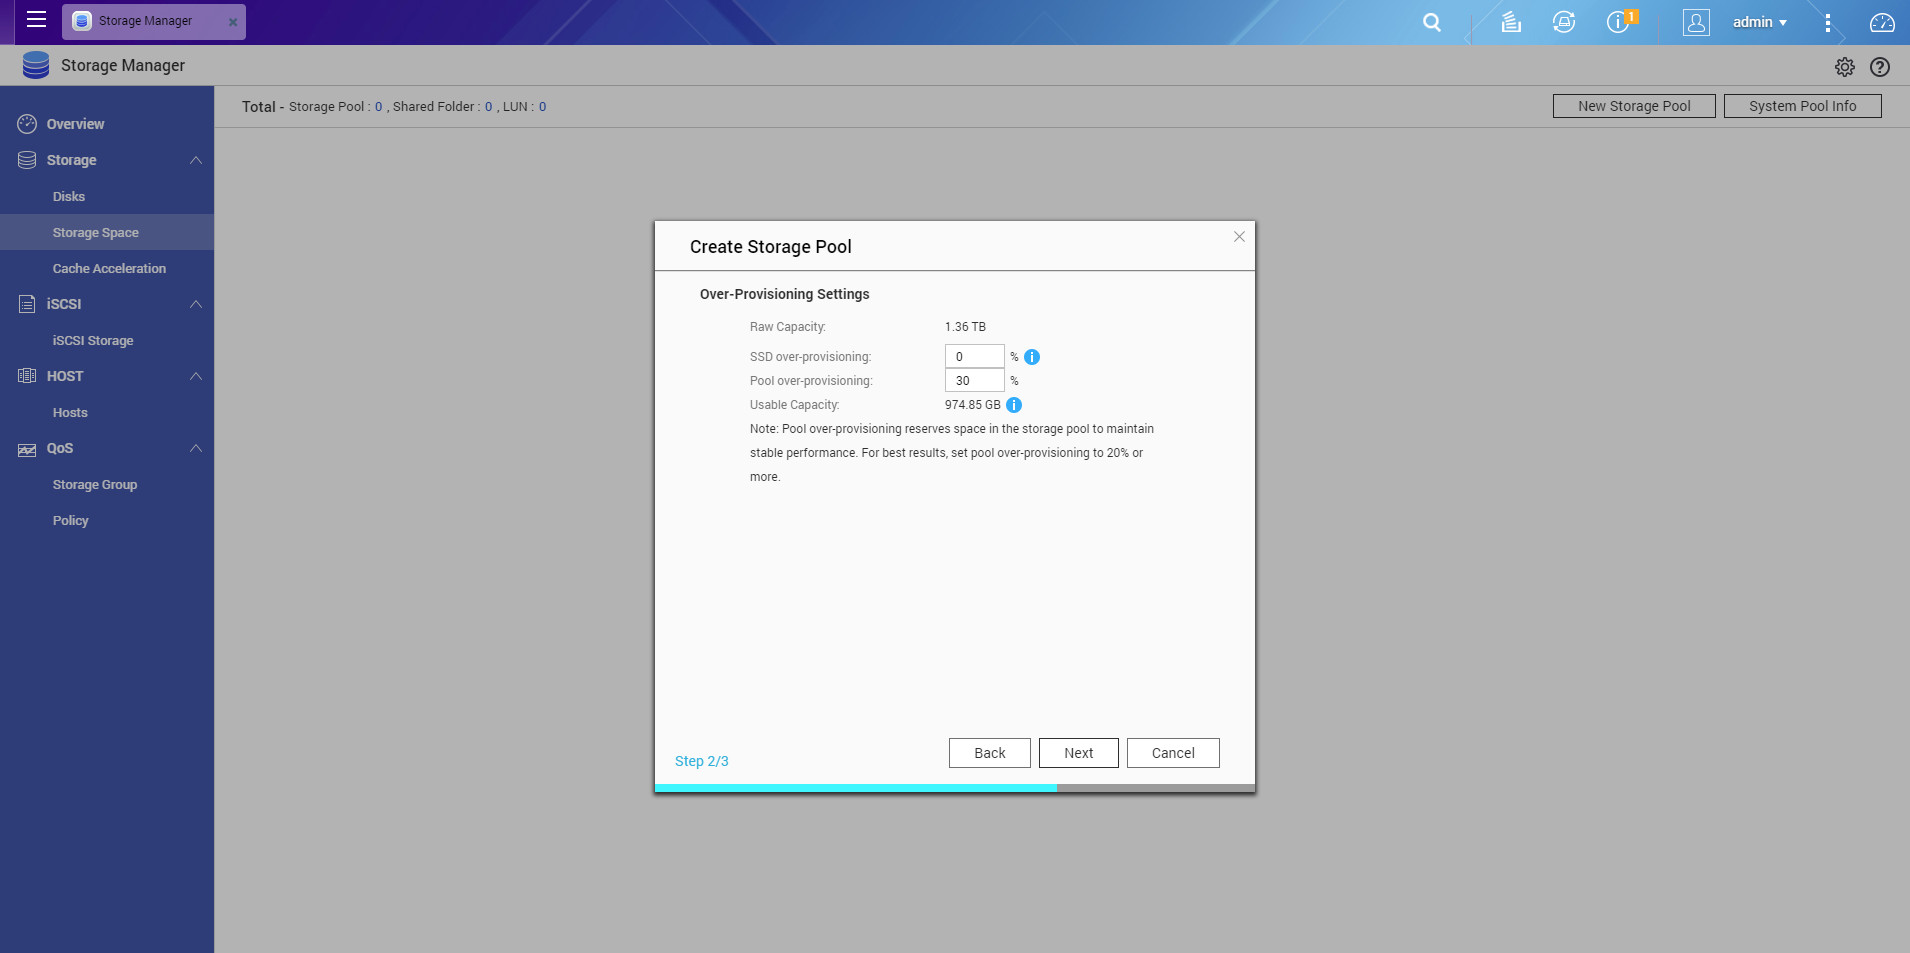
STEP 6. Input [SSD over-provisioning] (this option is not available if you use HDDs to create Storage Pool) and [Pool over-provisioning], or leave the default settings, and click [Next].
-
STEP 7. Confirm all the settings and click [Create].

-
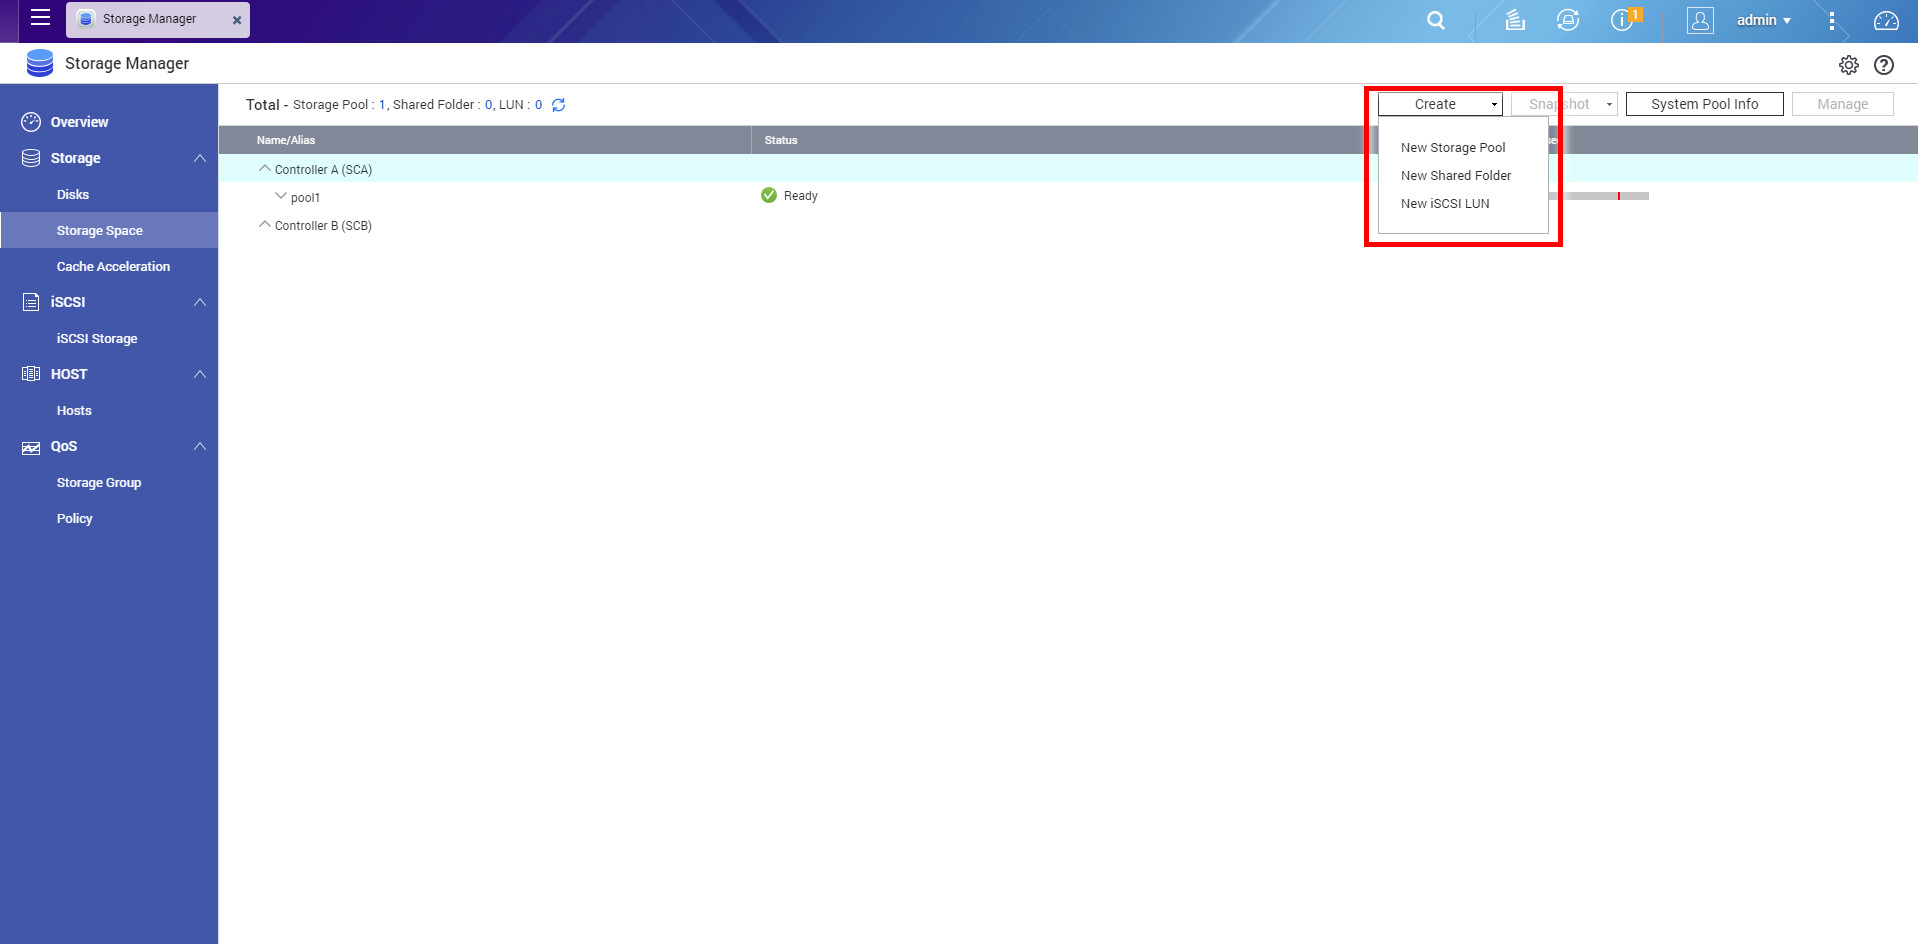
STEP 8. Upon finishing, a storage pool has been created and it is ready for use. Now you can create a new shared folder or an iSCSI LUN from the [Create] dropdown menu.
4. Check for Updates
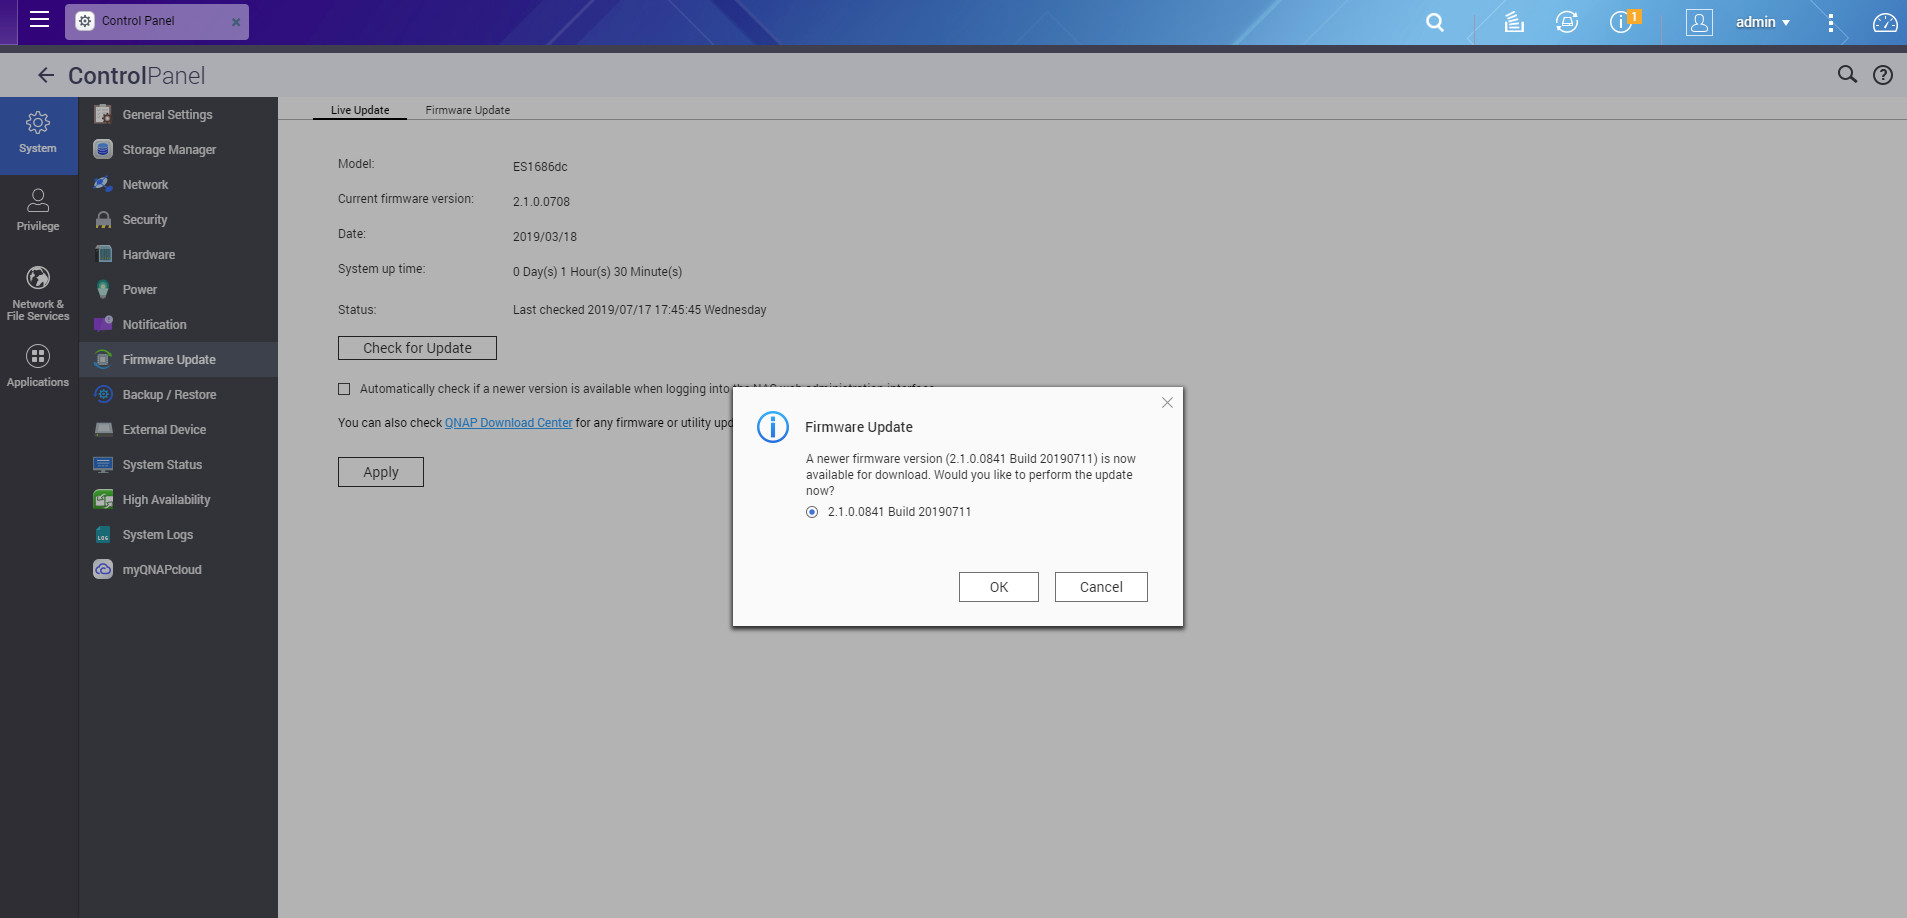
After the system has been properly configured, it is important to keep your system up-to-date. You can simply log into QES, go to [Control Panel] > [Firmware Update], and manually click [Check for Update] to see if there's any new update for your NAS system. In addition, if live update is enabled, system admin will be notified everytime when logging into the QES web portal.
Note: QES supports optional rolling update of firmware, one system controller is still on service while another one updating firmware.
Online Resources
User Manual
Click here to view the user manual.
Application Notes
Click here to view the application notes.